

Installation
Framing, spacing, gaps, screw distances and finishing, for every application Cemtone publishes guidance for. Five rules hold everywhere; the rest is per application.
Every application
| Rule | Figure |
|---|---|
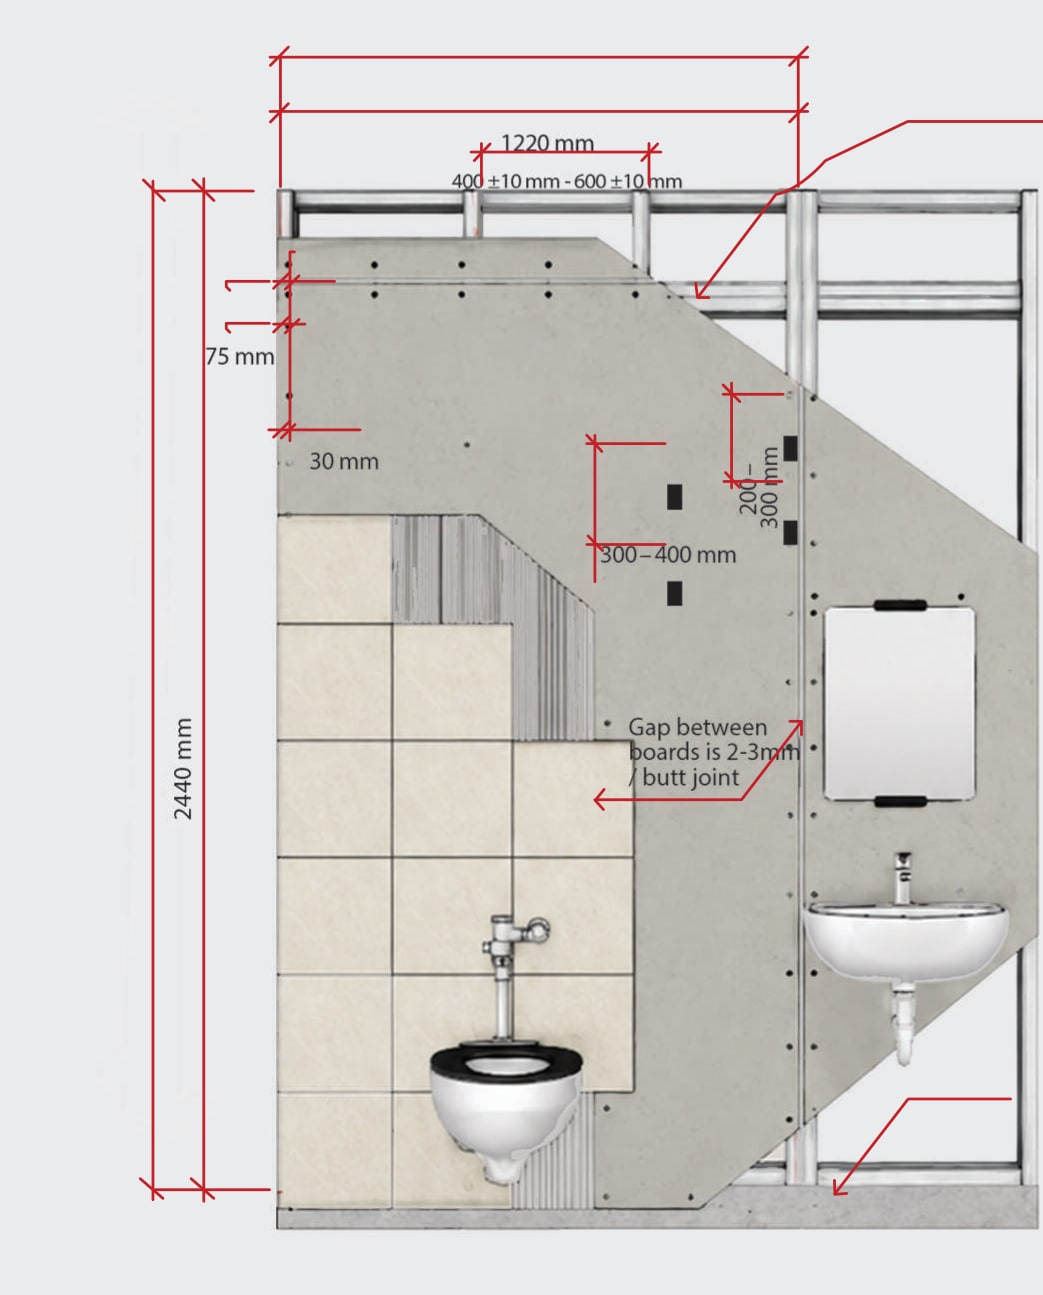
| Gap between boards | 2–3 mm, butt joint as required |
| Screws along a board edge | 200–300 mm apart |
| Screws in the field of the board | 300–400 mm apart |
| Clear of a corner | 75 mm |
| Clear of an edge | 30 mm |
Apply mesh tape over board gaps. Cover gaps and screw holes with Cemtone putty. Drill pilot holes — do not punch them.
| Item | Specification |
|---|---|
| Thickness | 9–12 mm internal. More than 12 mm where the surface is exposed, or as specified |
| Framing, internal | Steel stud frame, 1.2 mm |
| Framing, external | Steel tube frame, 3 inches × 2.3 mm, or as the designer instructs |
| Vertical spacing | 400 ±10 mm to 600 ±10 mm |
| Horizontal spacing | 2440 mm |
| Off the floor | Board starts 100 mm above floor level, to keep board and studs out of water |

| Item | Specification |
|---|---|
| Thickness | 12, 15 or 18 mm |
| Frame grid | 400 ±10 mm × 400 ±10 mm |
| Laying pattern | 1:2 pattern stack |

| Item | Specification |
|---|---|
| Thickness | 6–9 mm for general use |
| Timber framing | Wooden stud, 1.5 × 3 inches |
| Steel framing | At least 1.2 mm thickness |
| Frame spacing | 400 ±10 mm to 600 ±10 mm |
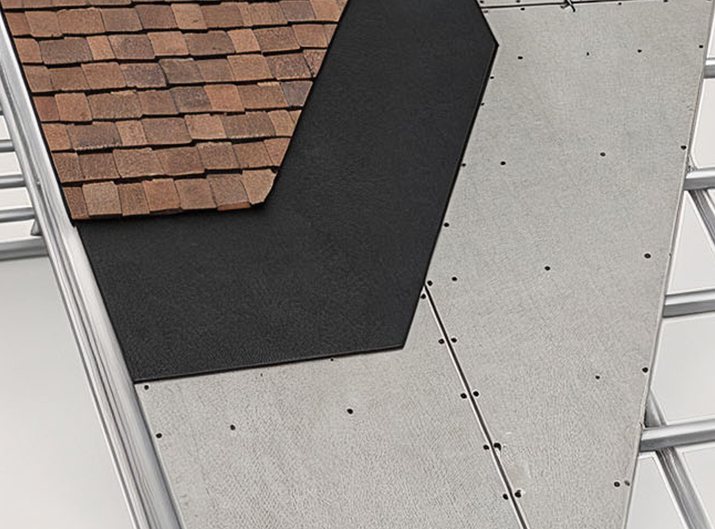
| Item | Specification |
|---|---|
| Thickness | 9–15 mm for general use |
| Framing and spacing | As the roof tile manual directs |
| Roof shingle or wood | Board over the purlins |
| Roof shingle tile | Board under the purlins |
| Coating | Clean with a damp cloth, then Cemtone PU coating (recommended) |
Wall underlay is the board used as a base for a finish fixed over it — ceramic tiles, or any fixture the wall has to carry.
| Item | Specification |
|---|---|
| Thickness | 9–12 mm required |
| Framing | Steel tube frame, 3 inches × 2.3 mm, or as the designer instructs |
| Vertical spacing | 400 ±10 mm to 600 ±10 mm |
| Horizontal spacing | 2440 mm, set 100 mm up the wall |
| Hanging points | Stud frames at every connection and hanging point — basin, sanitary ware |
| Before tiling | Damp cloth, then Cemtone Sealer (recommended) — or a bonding coat left 1–4 hours to set, then adhesive |
| Tile size | Not larger than 600 × 600 mm |
| Item | Specification |
|---|---|
| Thickness | 9–12 mm for general use |
| Fixing to concrete | Concrete nails every 200 mm along the board |
| Sealing | Gaps and holes covered with polyurethane sealant |
| Adhesive | Board laid with adhesive, then the floor covering |
Cemtone publishes this system for walls and ceilings.
Three applications are finished differently. A sub roof is cleaned with a damp cloth and coated with Cemtone PU coating. Wall underlay with ceramic tiles goes damp cloth, then Cemtone Sealer or a bonding coat, then tiling. Surface and covering on a cement floor goes polyurethane sealant, adhesive, then the floor covering. The paint system above does not apply to any of the three.
These recommendations are provided as general manufacturer guidance. All site installation work shall be carried out in accordance to engineer specifications.
The tested values behind the board are on the technical page. Which thickness suits which job is on the board page.
To put a quantity against the spacings above, the board calculator takes an area and returns the sheets, the weight, the framing in linear metres at these centres and the joint length.